Moody Photography: Tips and Tricks
Photography can’t be all golden hour, especially in the moody Pacific Northwest. Fortunately, I vastly prefer shooting in overcast, rainy, big drama kind of weather and because of that, I have learned some tips and tricks over the years.

Plan with the Forecast in Mind
One of my favorite parts of shooting in moody weather is the variety. On any given day, there can be dry and overcast conditions, to dumping rain, to a soft, foggy golden hour.
Checking an hourly forecast can be one of the secrets to getting the best conditions. Most weather apps or local news sources usually have an hourly option. Referencing the forecast hour by hour can tell you roughly when rain will begin and end, when the sky might be clearing, if there will be fog, etc. I often find that aiming for just after a storm or heavy rain leads to really beautiful conditions.
If you really want to nerd out, there are even more detailed weather projections to look at. I often head to NOAA, type in the location I’ll be shooting at or use their map feature, and then scroll down to their hourly forecast link. That link takes you to a set of line graphs. These graphs offer a number of data points that can help you determine what the weather might be. For example, I love shooting in foggy conditions, so I check the predicted amount of fog. I also love taking photos right after a heavy rain, so I can check when the rain will be at its heaviest and plan accordingly. If you are hoping to catch a sunset, but aren’t sure if the clouds will clear, you can check what percent of the sky will be covered at a specific point in time. There is a great deal of information out there that can help you plan!

Sample hourly forecast graph from NOAA
Of course, no forecast is perfect and can also be unpredictable. This is part of the beauty of the Pacific Northwest. I can’t count the number of times I have checked the forecast and then still found myself surprised by the weather. The constantly changing conditions means things are never boring and your photos won’t be either.
Prepare Ahead of Time
Moody weather has implications for your safety and your gear. It’s important to be prepared for the expected and unexpected. Not only is this just a good idea in general, it also helps ensure you enjoy your time outdoors as much as possible.
After checking the forecast, wear clothes that will keep you safe and comfortable. Maybe that’s multiple layers, maybe something water-resistant- it all depends on the weather. Consider how warm or cold it might get, or how rainy it might be and plan accordingly. I also often throw an extra set of clothes in the back of my car just in case I get soaked or, speaking from real life lived experiences, fall in the mud in the middle of the day and unable to quickly get home to change. Depending on the season, you may also need a hat, gloves, etc. I find gloves can be cumbersome when I’m trying to change the settings on my camera, so I bought gloves similar to these.
The right gear is also crucial for protecting your camera and lenses. A waterproof camera bag or a bag with a rain cover is important. I use this camera bag because I love the compartments, internal padding, and laptop space. While the bag isn’t entirely waterproof, I have found it to hold up well against a little rain. I keep the rain cover in one of the pockets so I can quickly access it in the event it’s raining hard, snowing heavily, or I will be outdoors for an extended period of time.
One of the trickiest parts of photographing in rain or snow is keeping your camera dry. Most cameras are designed to be “weather-sealed”. This design helps keep liquid, dust, etc. from getting in the camera. Since cameras and lenses are an investment, I prefer to add extra protection from the elements with this rain cover. It covers the camera and lens while still allowing full access to all camera functions. It also can fold up or be shoved in a pocket, so its easy to pack. While a rain cover can sometimes create an extra step of sliding the cover out of the way or adjusting it, it does give me added peace of mind and that is always worth it.
A few other things to keep in mind: Even with a rain cover on your camera, rain and snow can still reach the lens. I usually keep a lens cloth or lens tissue handy to remove the water safely without scratching the lens. Wind can also be a factor to consider when photographing. I am not a photographer who regularly uses a tripod, but for those who do, it’s important to prevent your tripod from tipping over in the wind. Either plan to hold on to it or even better- use something to anchor or weigh it down.
**As an Amazon Associate, I may earn a small commission from qualifying purchases accessed via the links above.
Choose a Subject
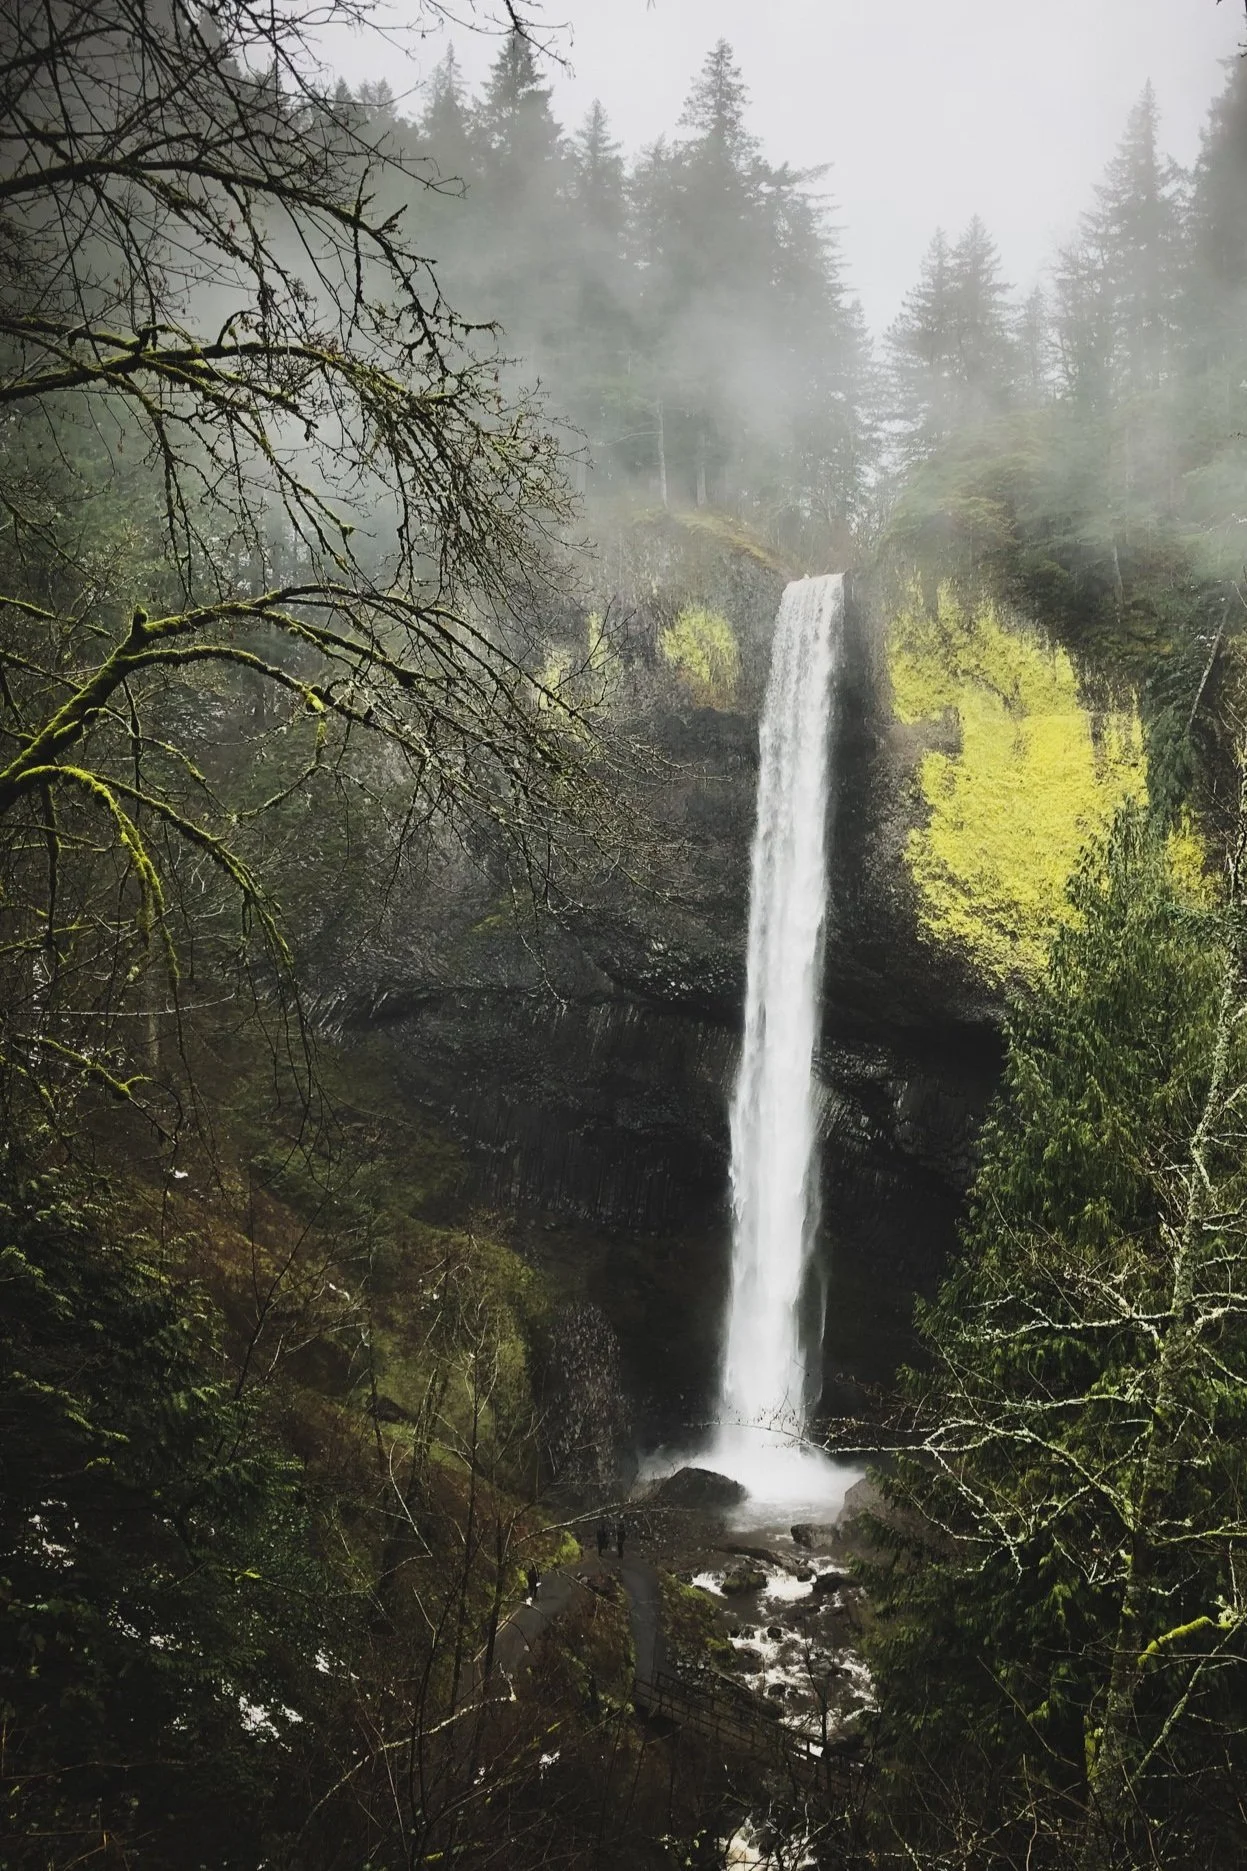
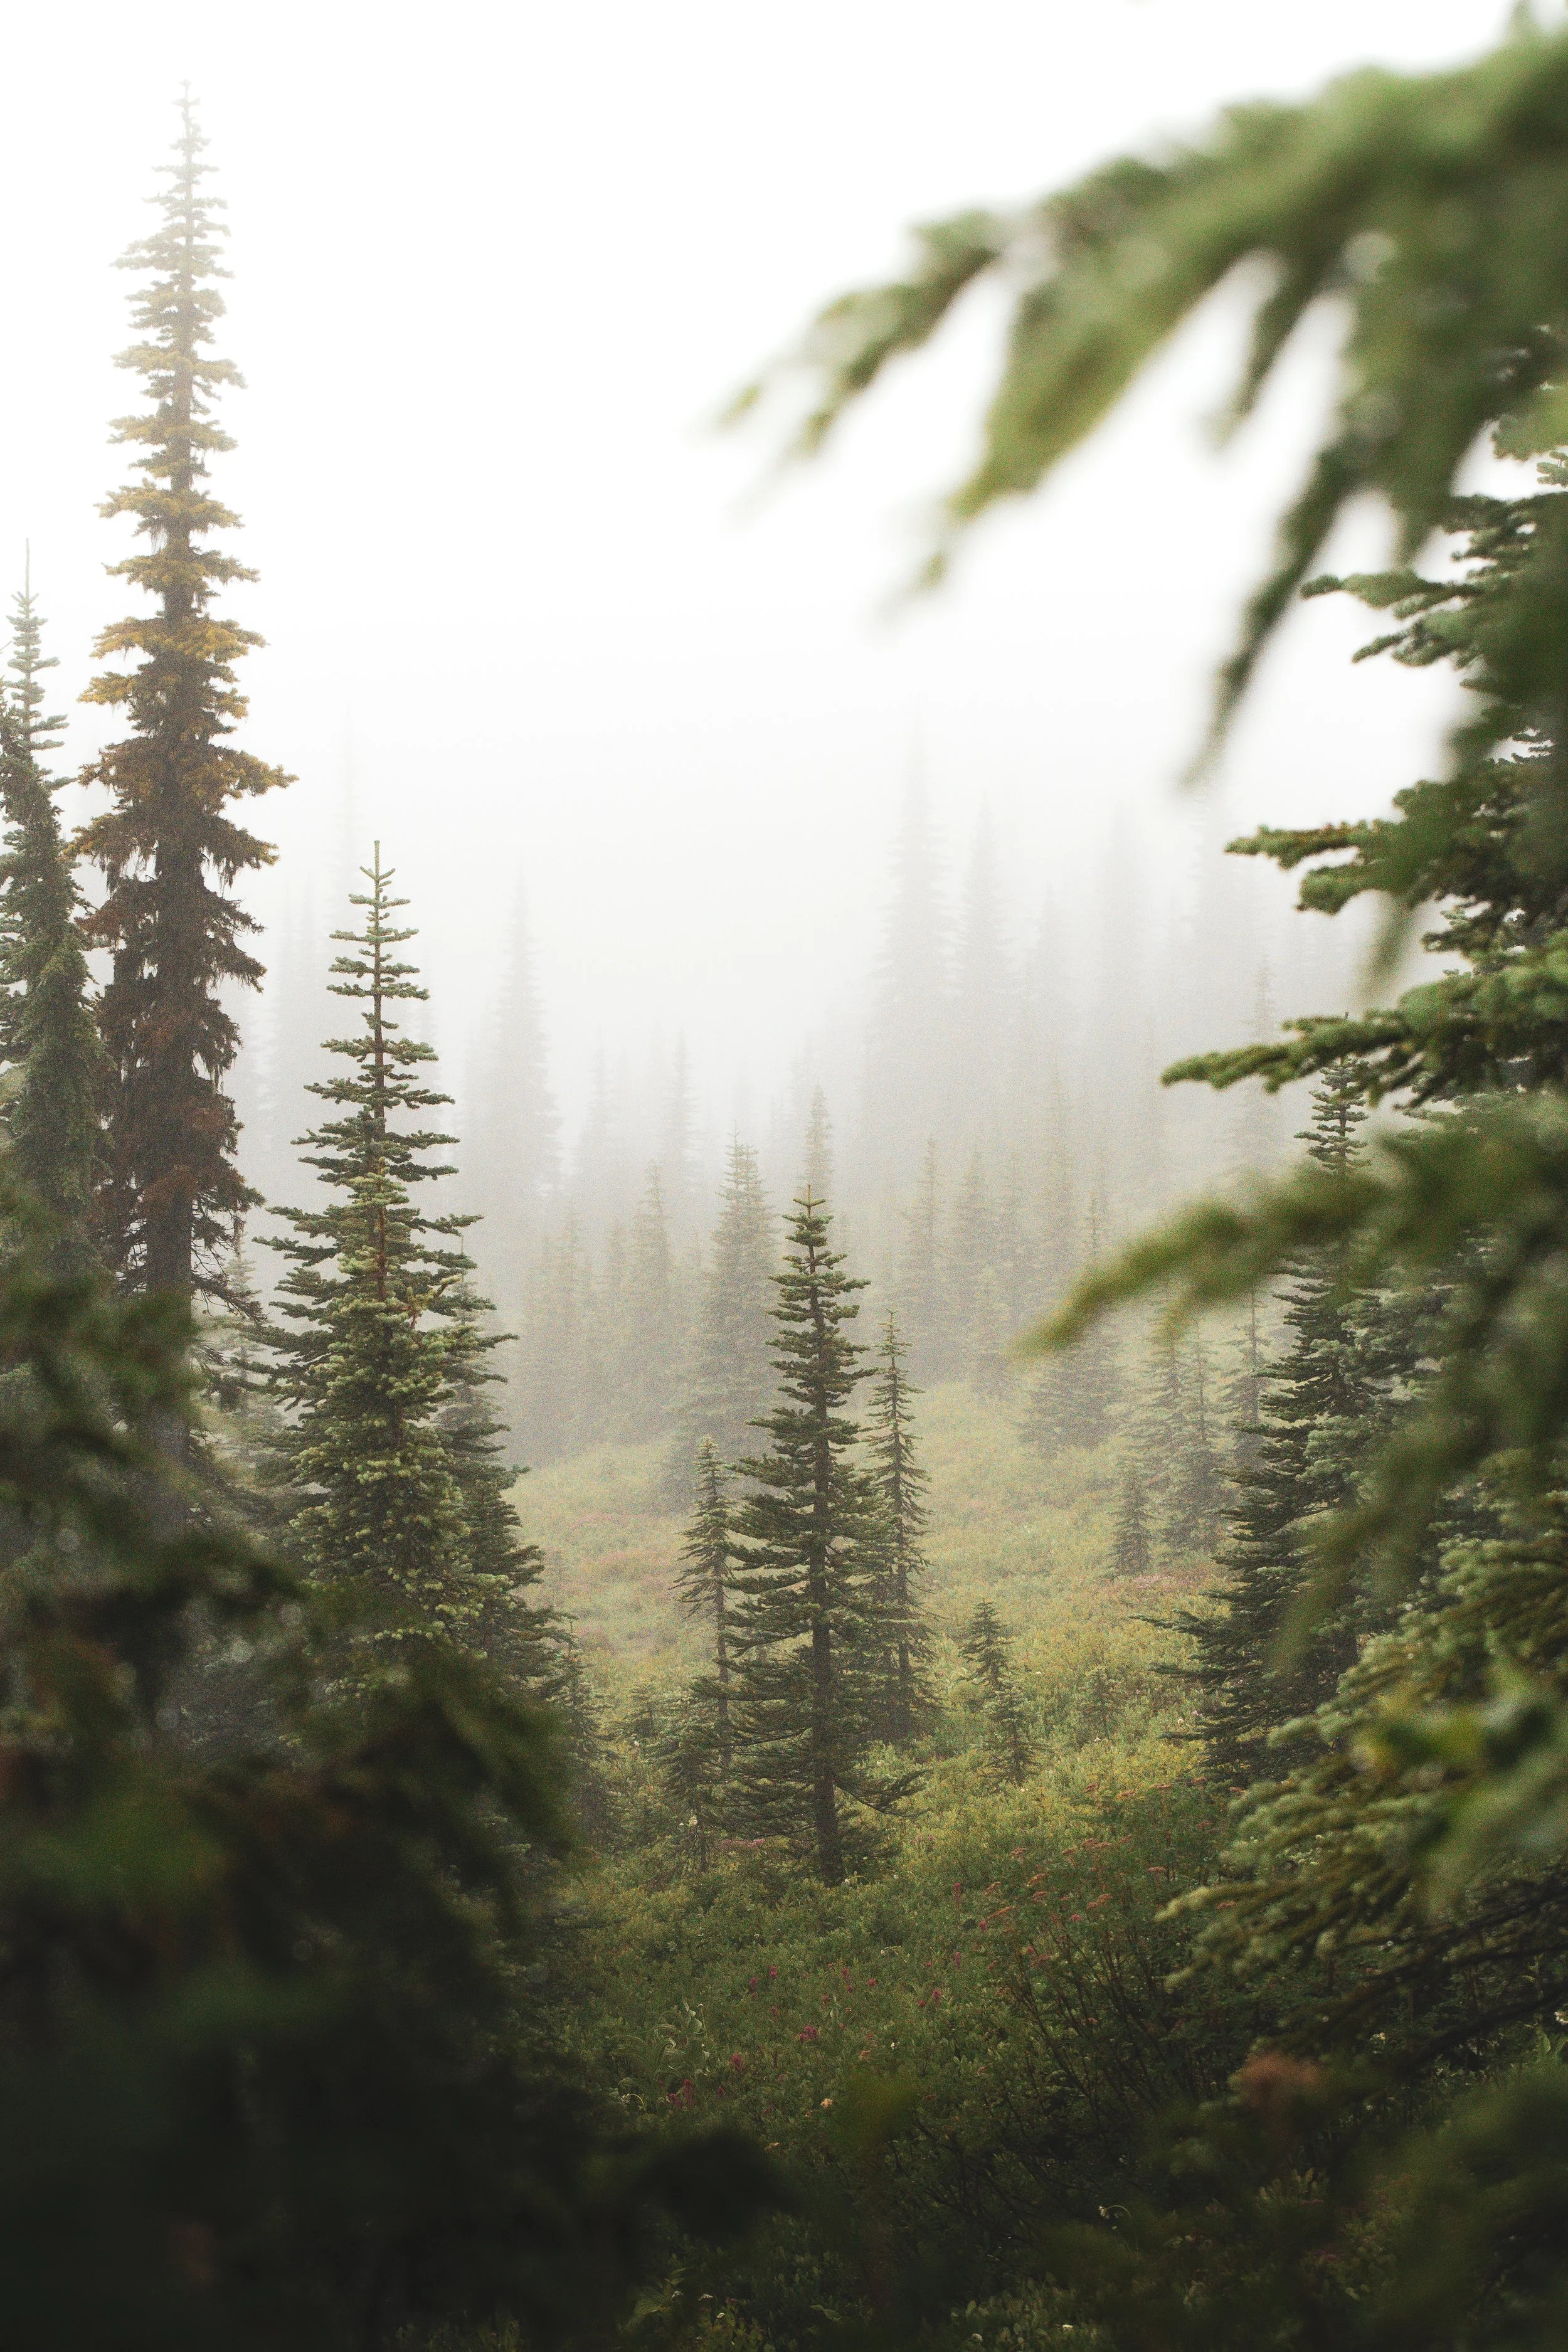
One of the reasons I love photographing in moody weather is how the weather can impact the subject of the photo. A few years ago, I was on top of Mt Rainier in a heavy, heavy fog. I was hoping the fog would lift so I could get a few shots of misty valleys dotted with pine trees. While I waited for the weather to shift, I chose to look for close-by subjects to shoot. In fog, the water droplets in the air can make it difficult or nearly impossible to photograph things far away. In those instances, the photos can look fuzzy and flat. However, objects close by will often have a beautiful white backdrop of fog that otherwise wouldn’t be there. As I walked around, I saw a blue bird darting between trees with a goldfish in his mouth. While I do not love wildlife getting a hold of human food, I tried to get a shot. The result worked out really well because of the foggy backdrop.
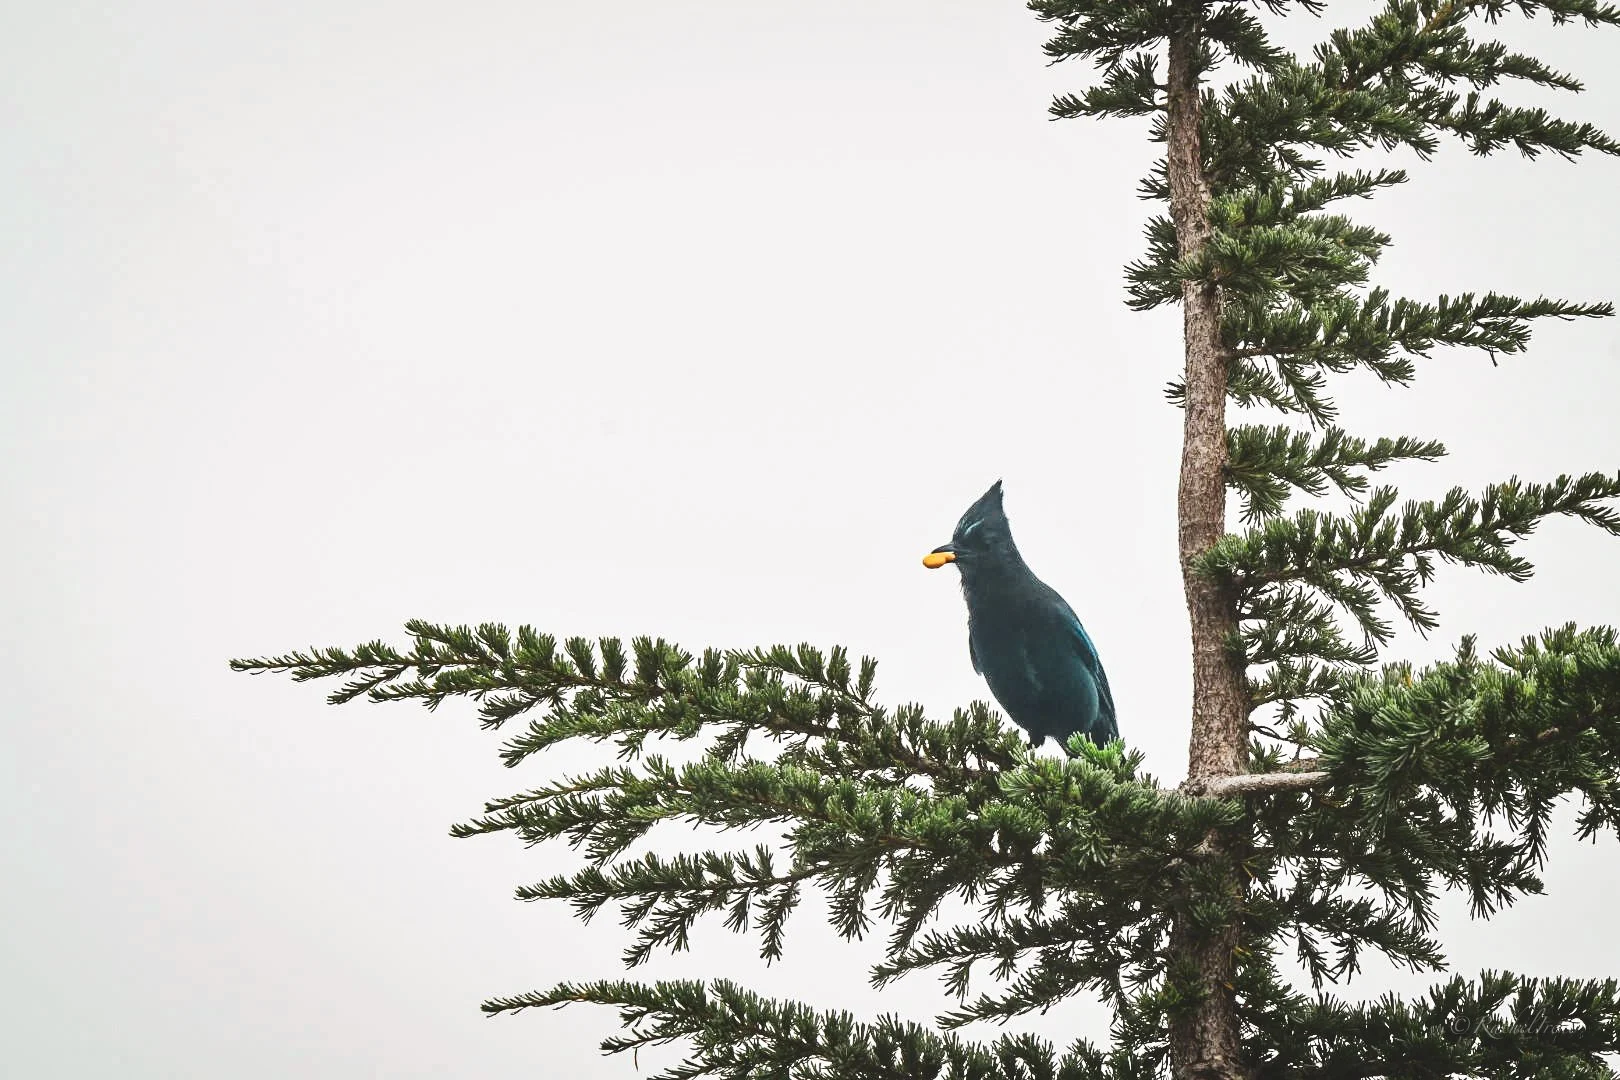
Blue bird eating a goldfish- Photo credit to Rachel Irene
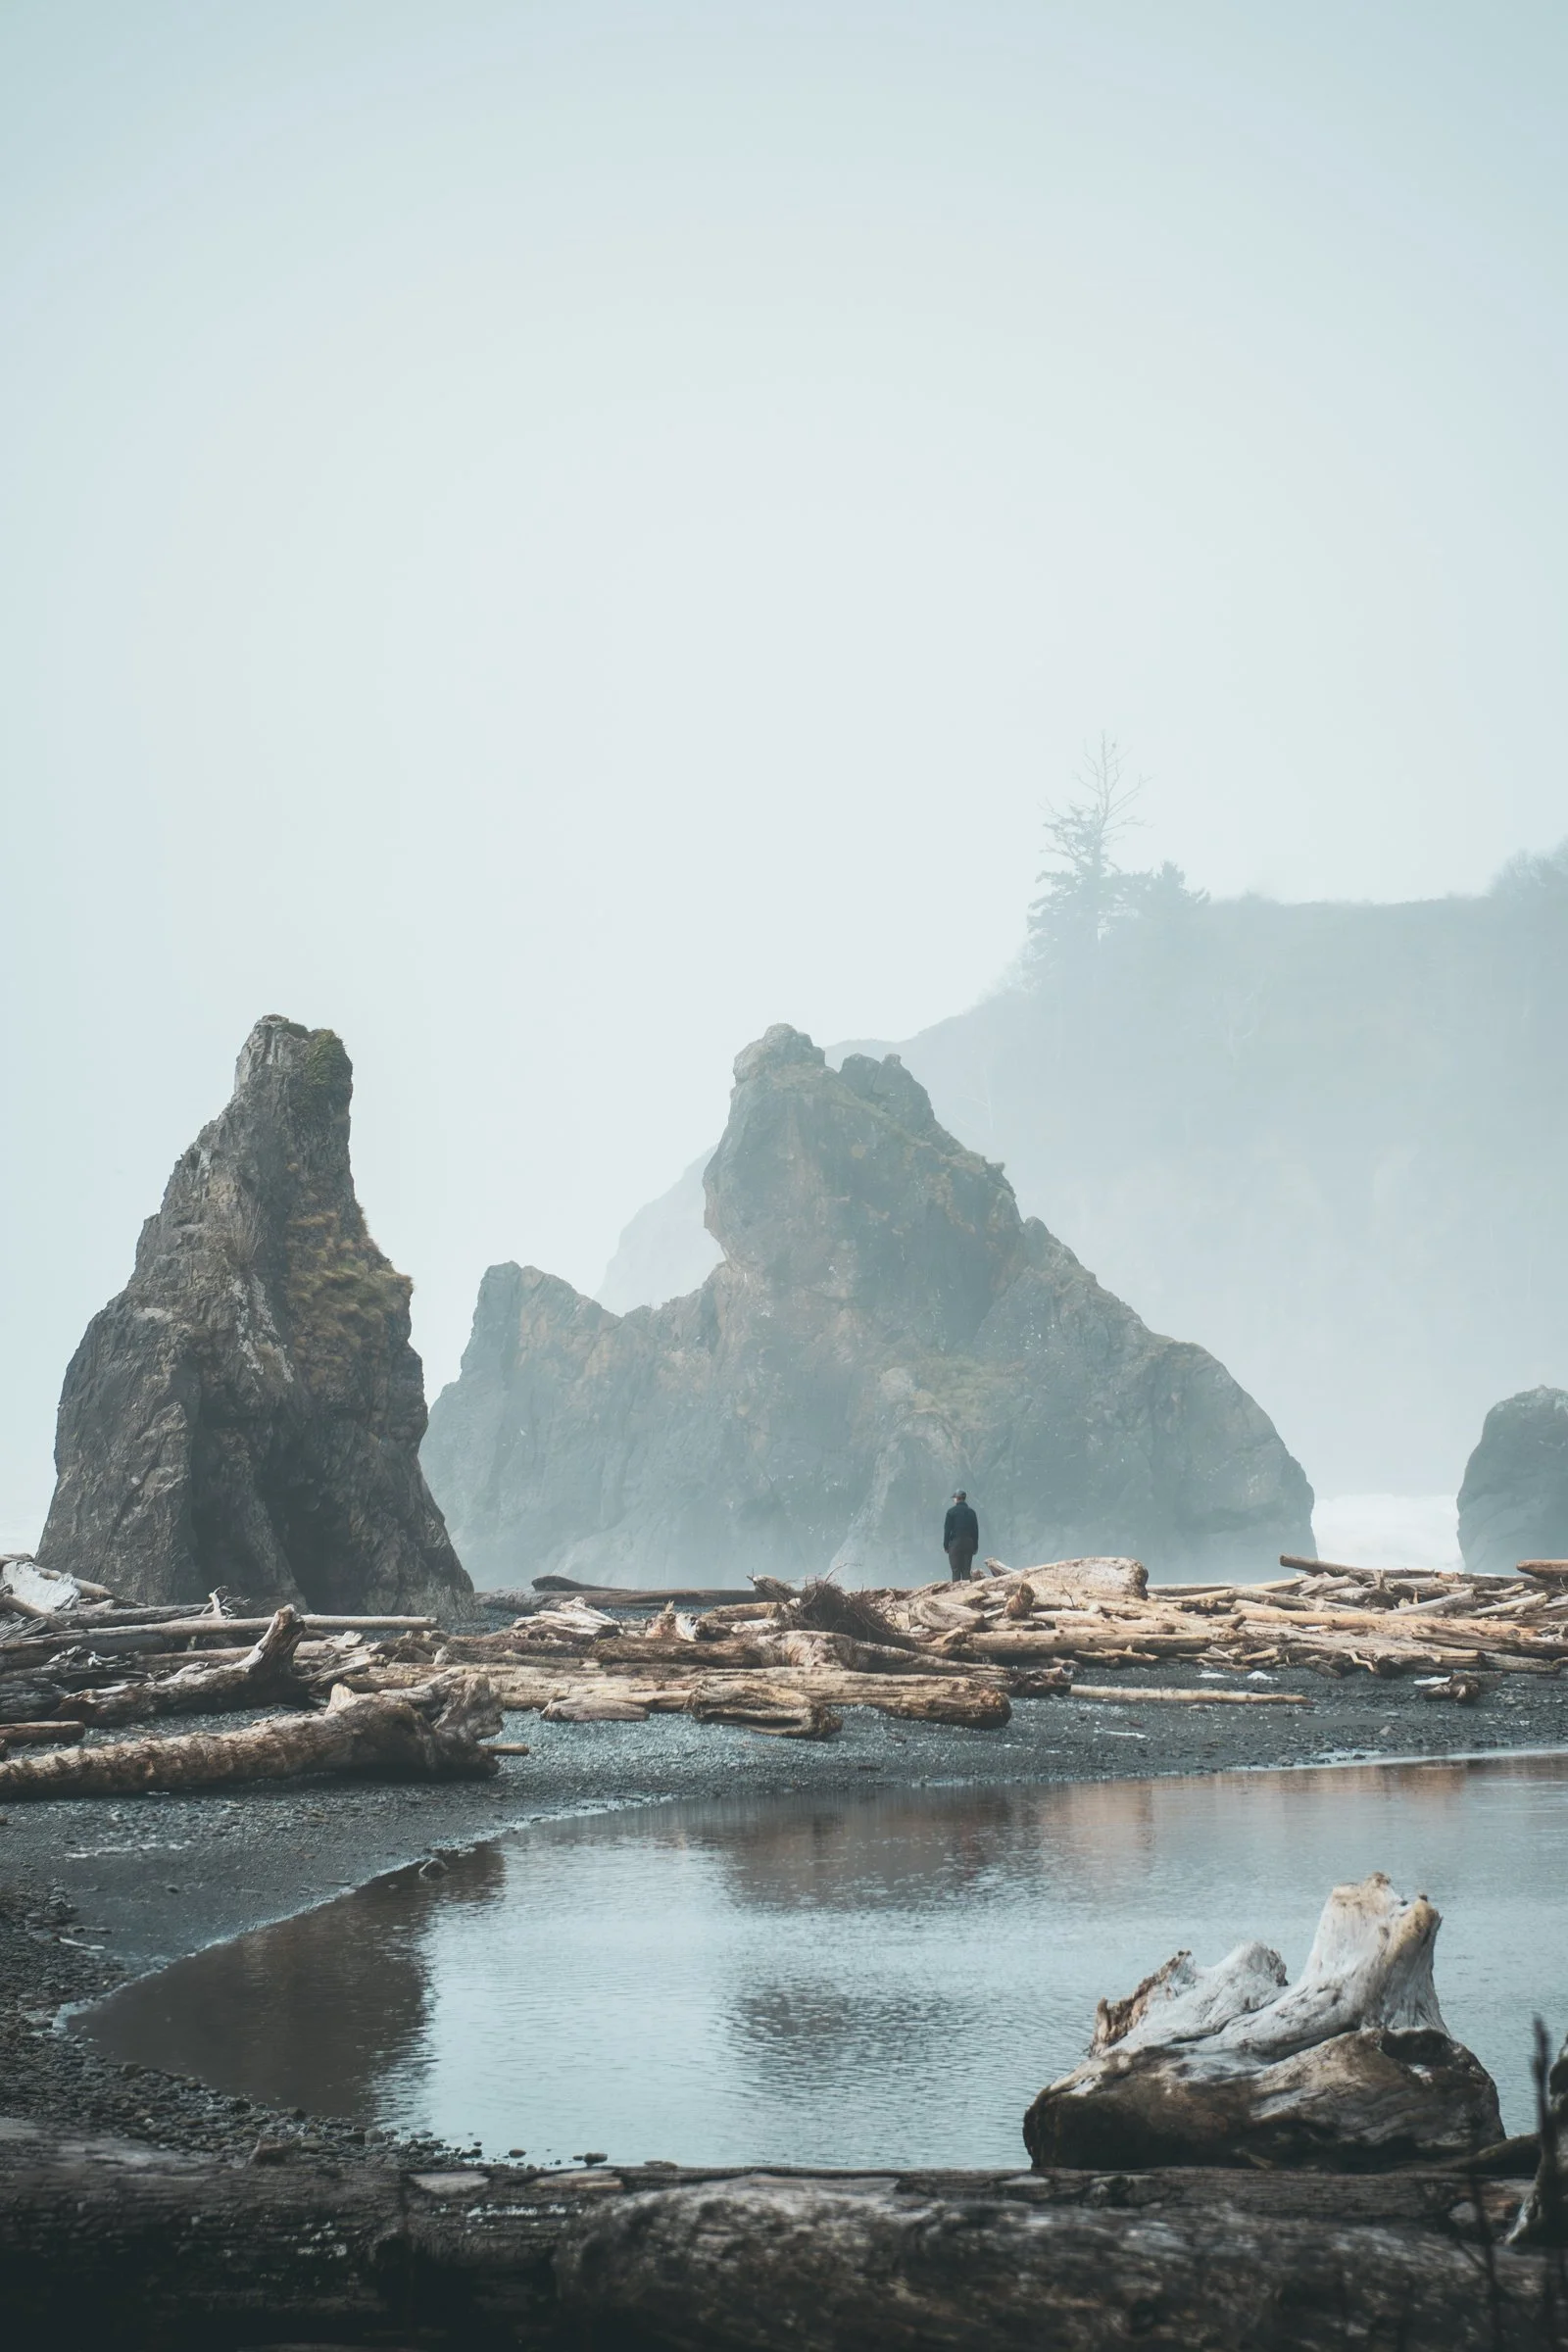
When the weather limits your options for subjects, it can also force you to look at the details. I’m often amazed at how many small, tiny details I miss when I’m focused on broad landscapes. Maybe it’s rain drops on a flower, or snow clinging to a branch, or a tree stump in a lake rising in front of the fog like the photo below. Keep your eyes peeled for small details or new ways of looking at familiar landscapes.
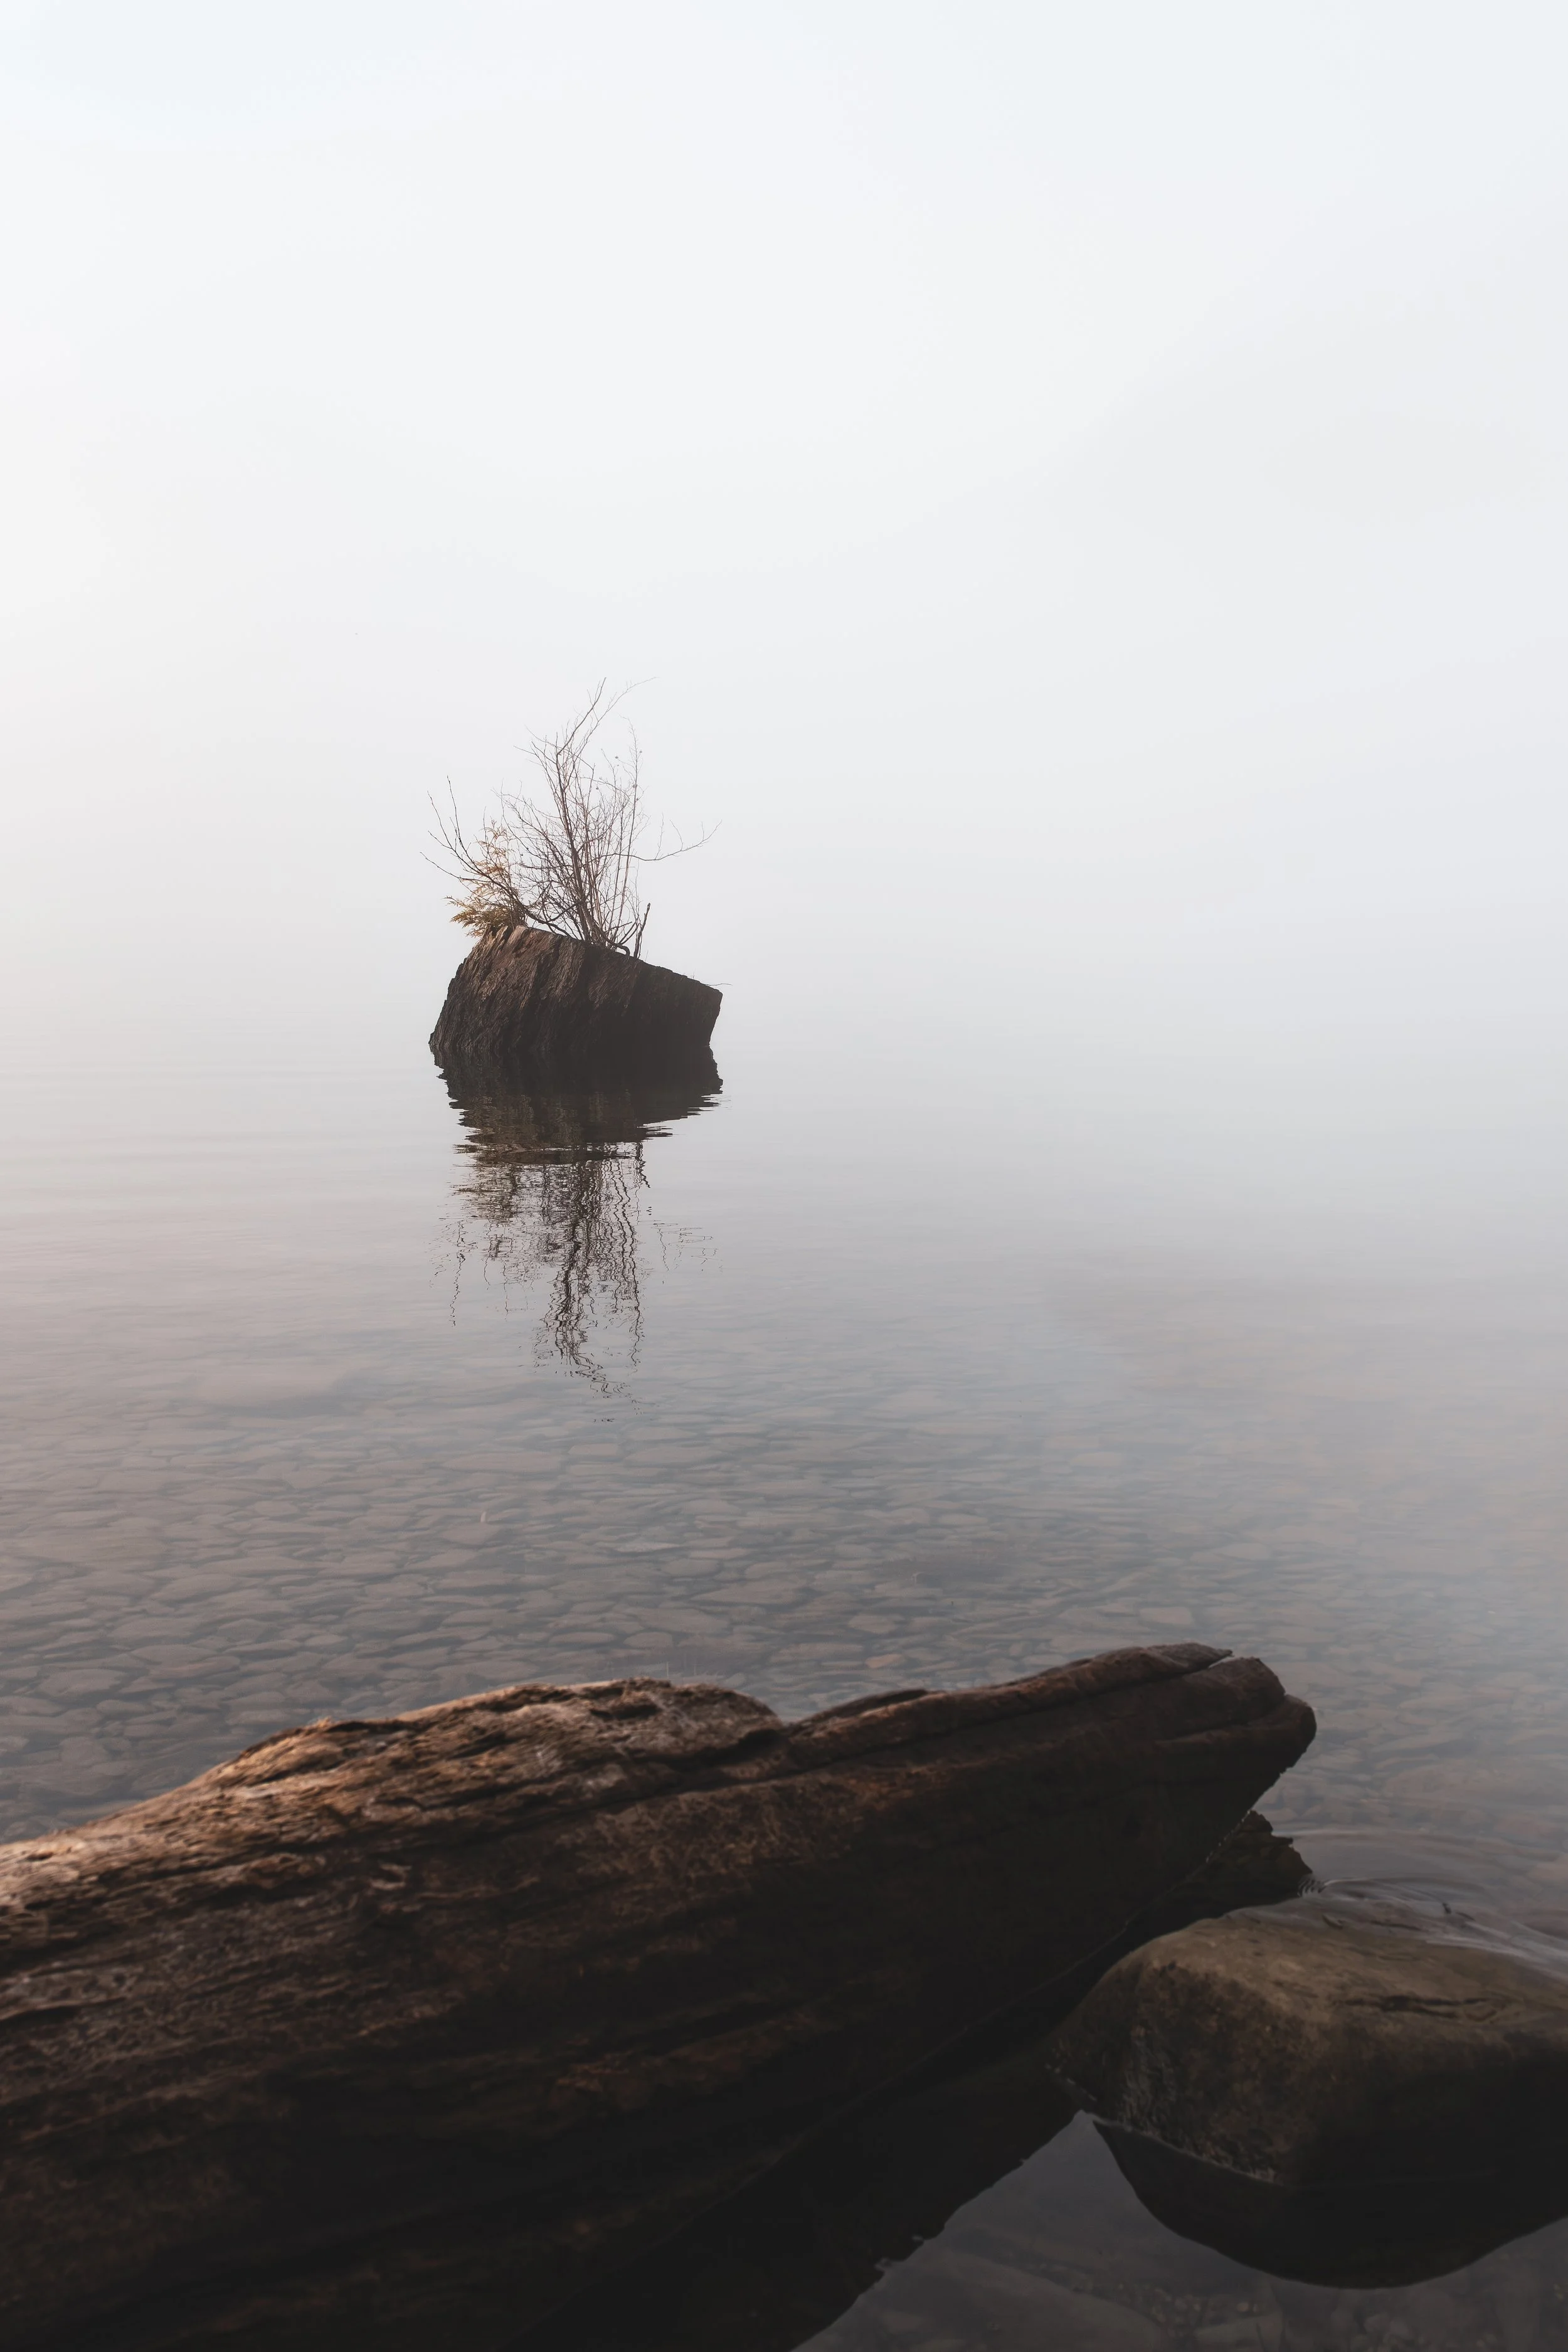
Lake Cresecent Fog- Photo Credit to Rachel Irene
Pay Attention to Lighting
Lighting is a huge factor in moody photography. The amount of light impacts your camera settings, exposure, etc. It can also help you choose a subject and determine your timing. Perhaps there’s a way to angle your photo so that your subject is backlit or create powerful shadows. I captured the photo below during surprise sunset on Whidbey Island. It had been cloudy most of the day, but the sun broke through just before sundown. During the middle of the day, there wasn’t anything special about this random picnic shelter. During the sunset, the sun cast a strong, warm glow and gave the water an orange hue. Watching how the light falls and how the light changes with time is key for dramatic photos.
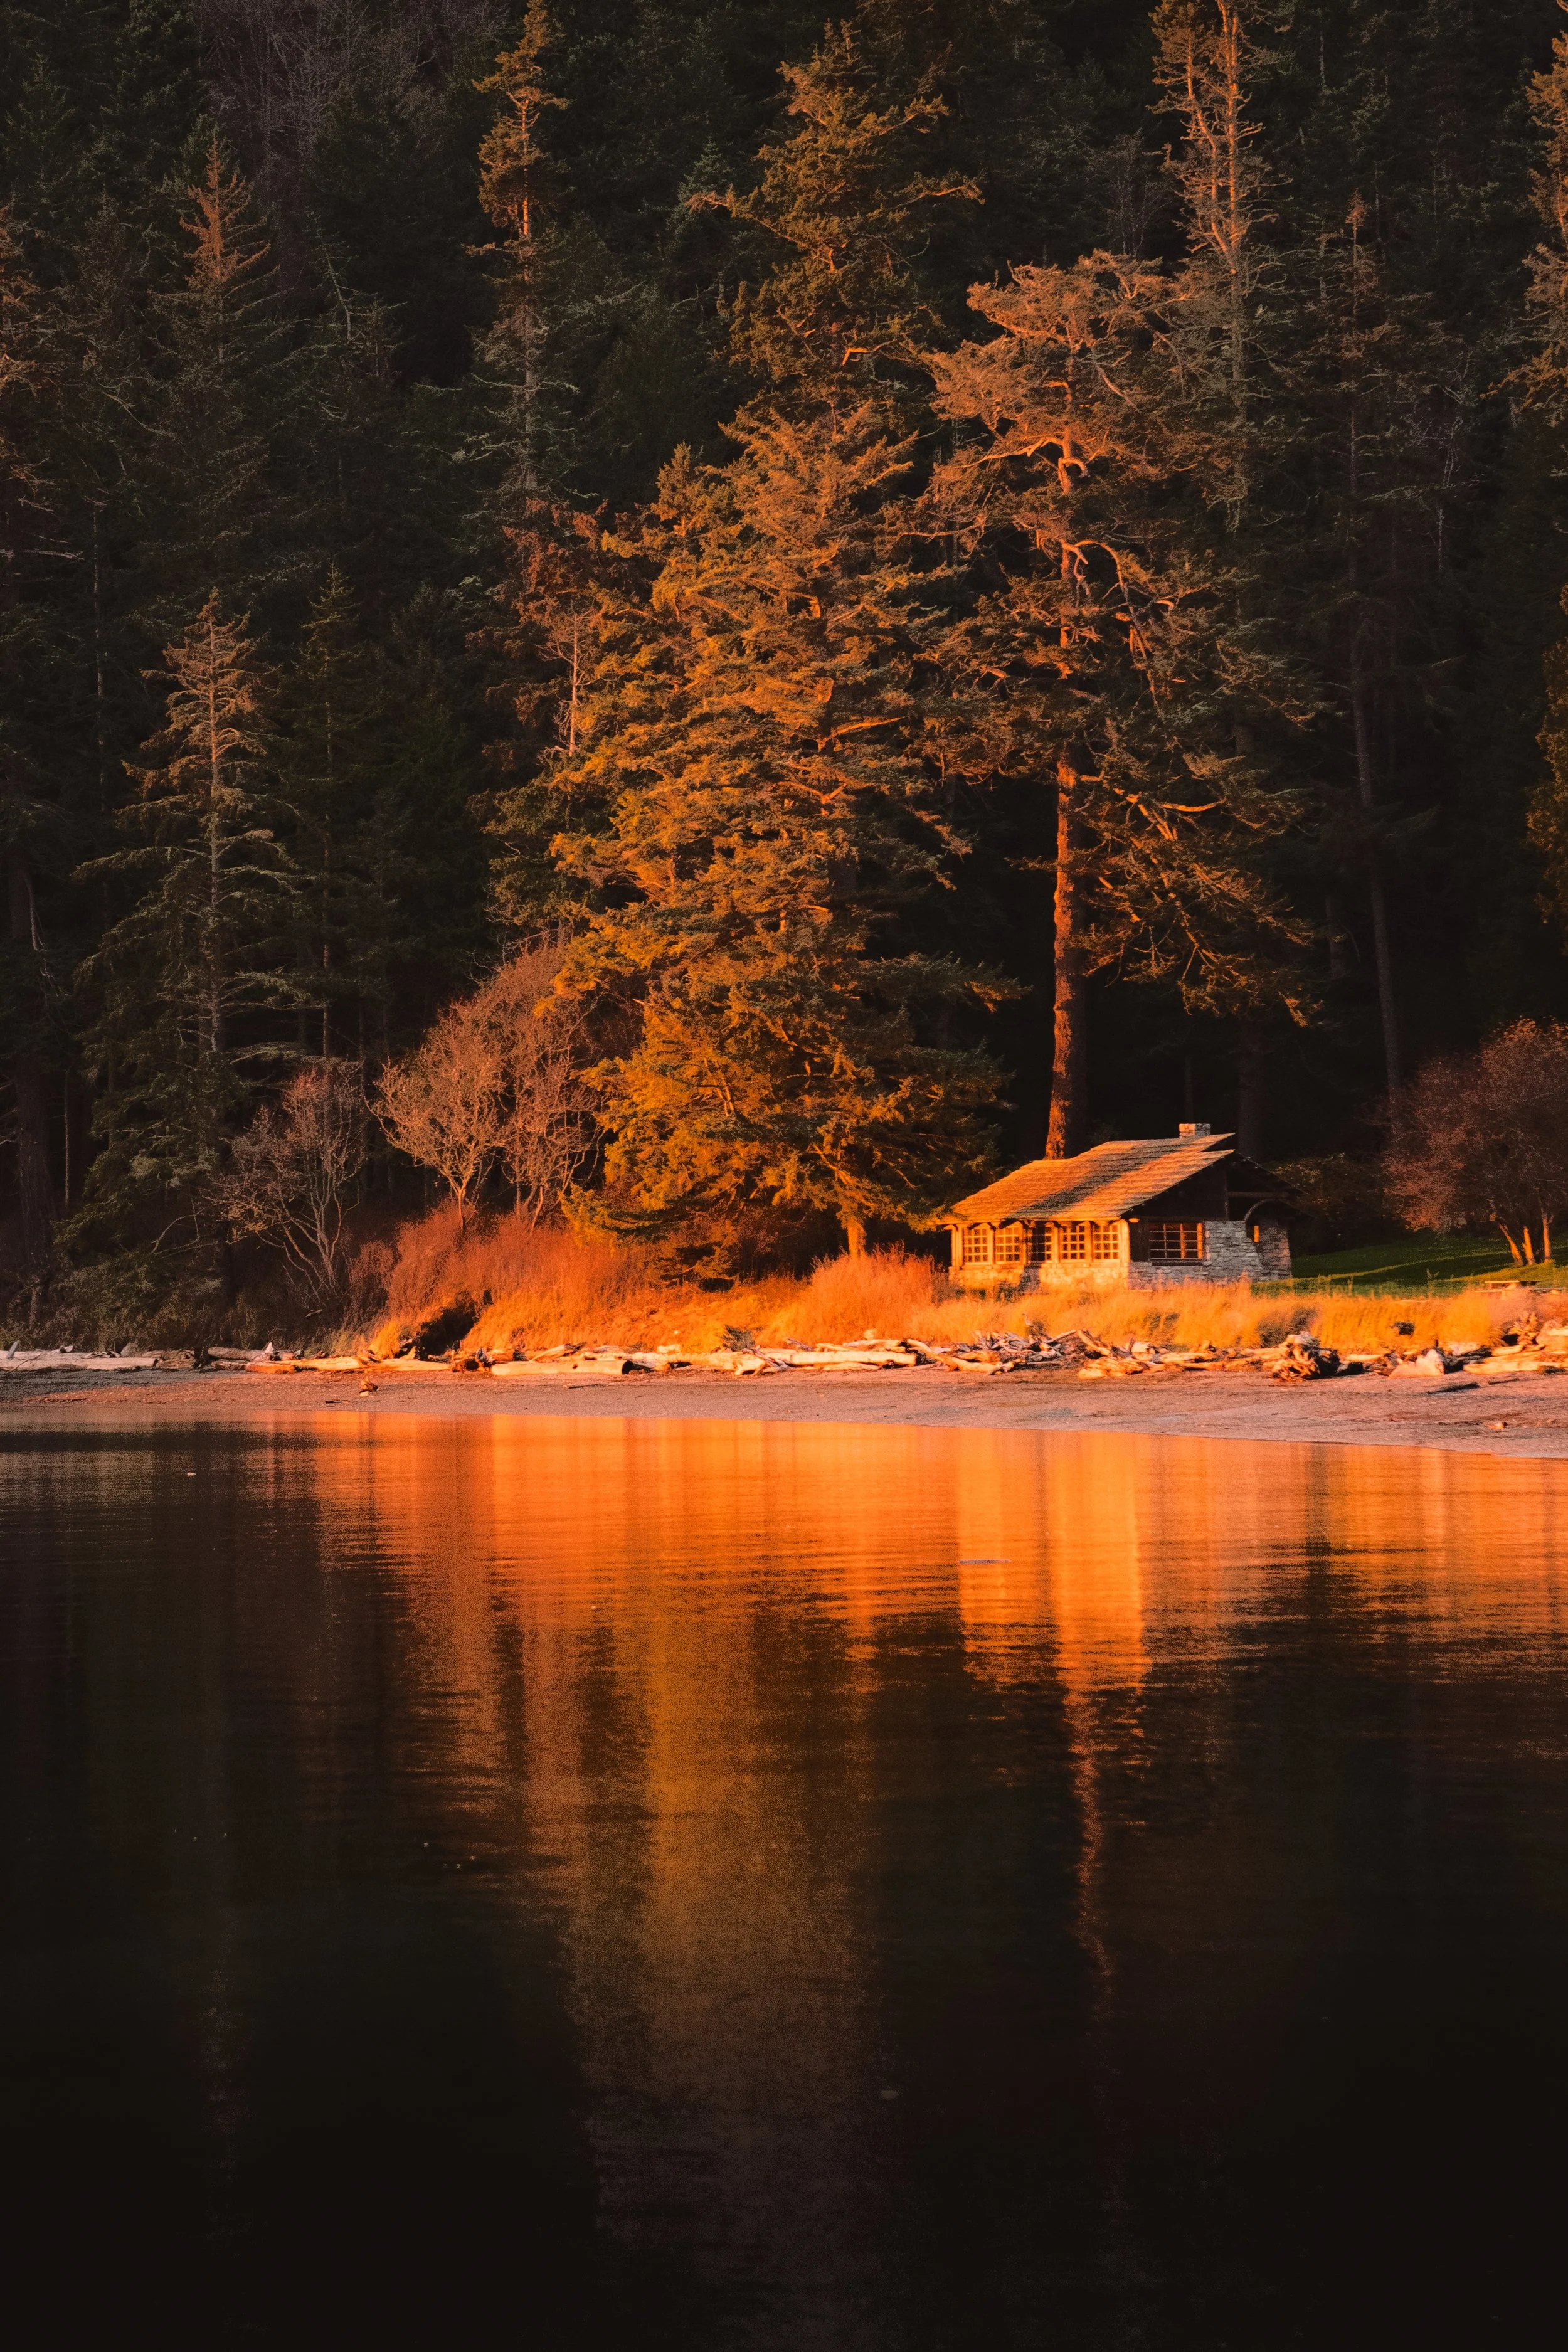
Whidbey Island Sunset- Photo Credit to Rachel Irene
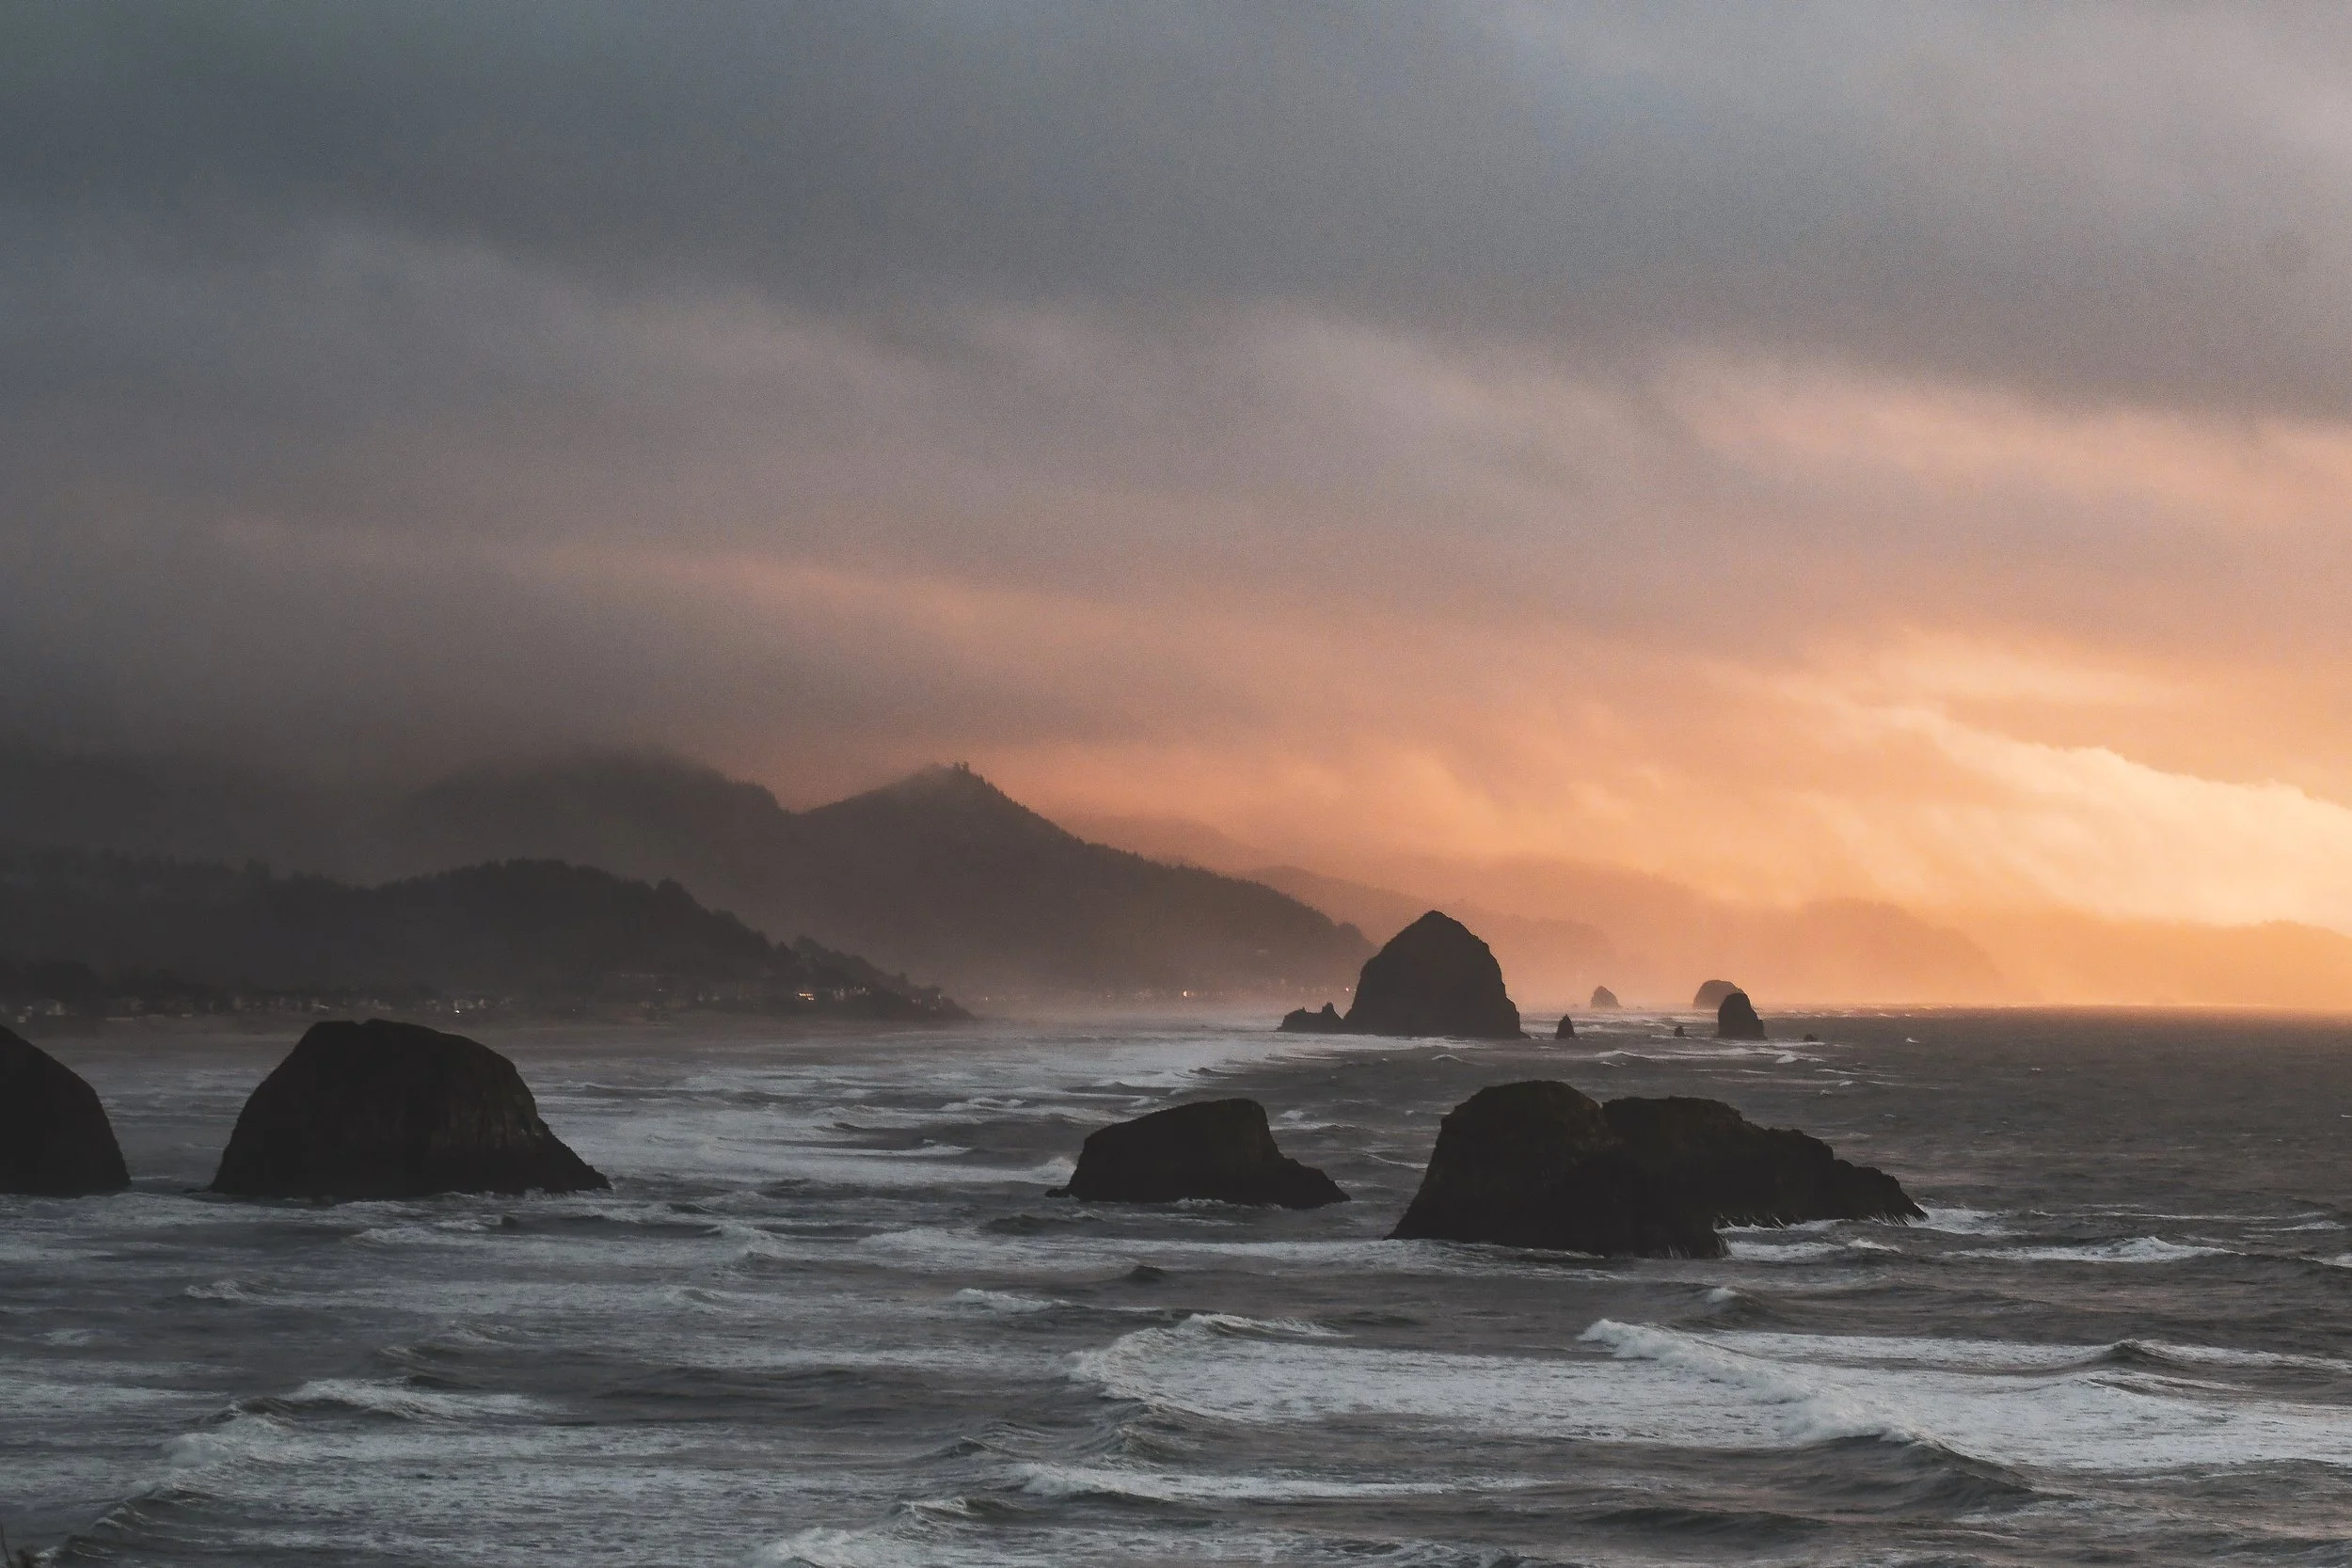
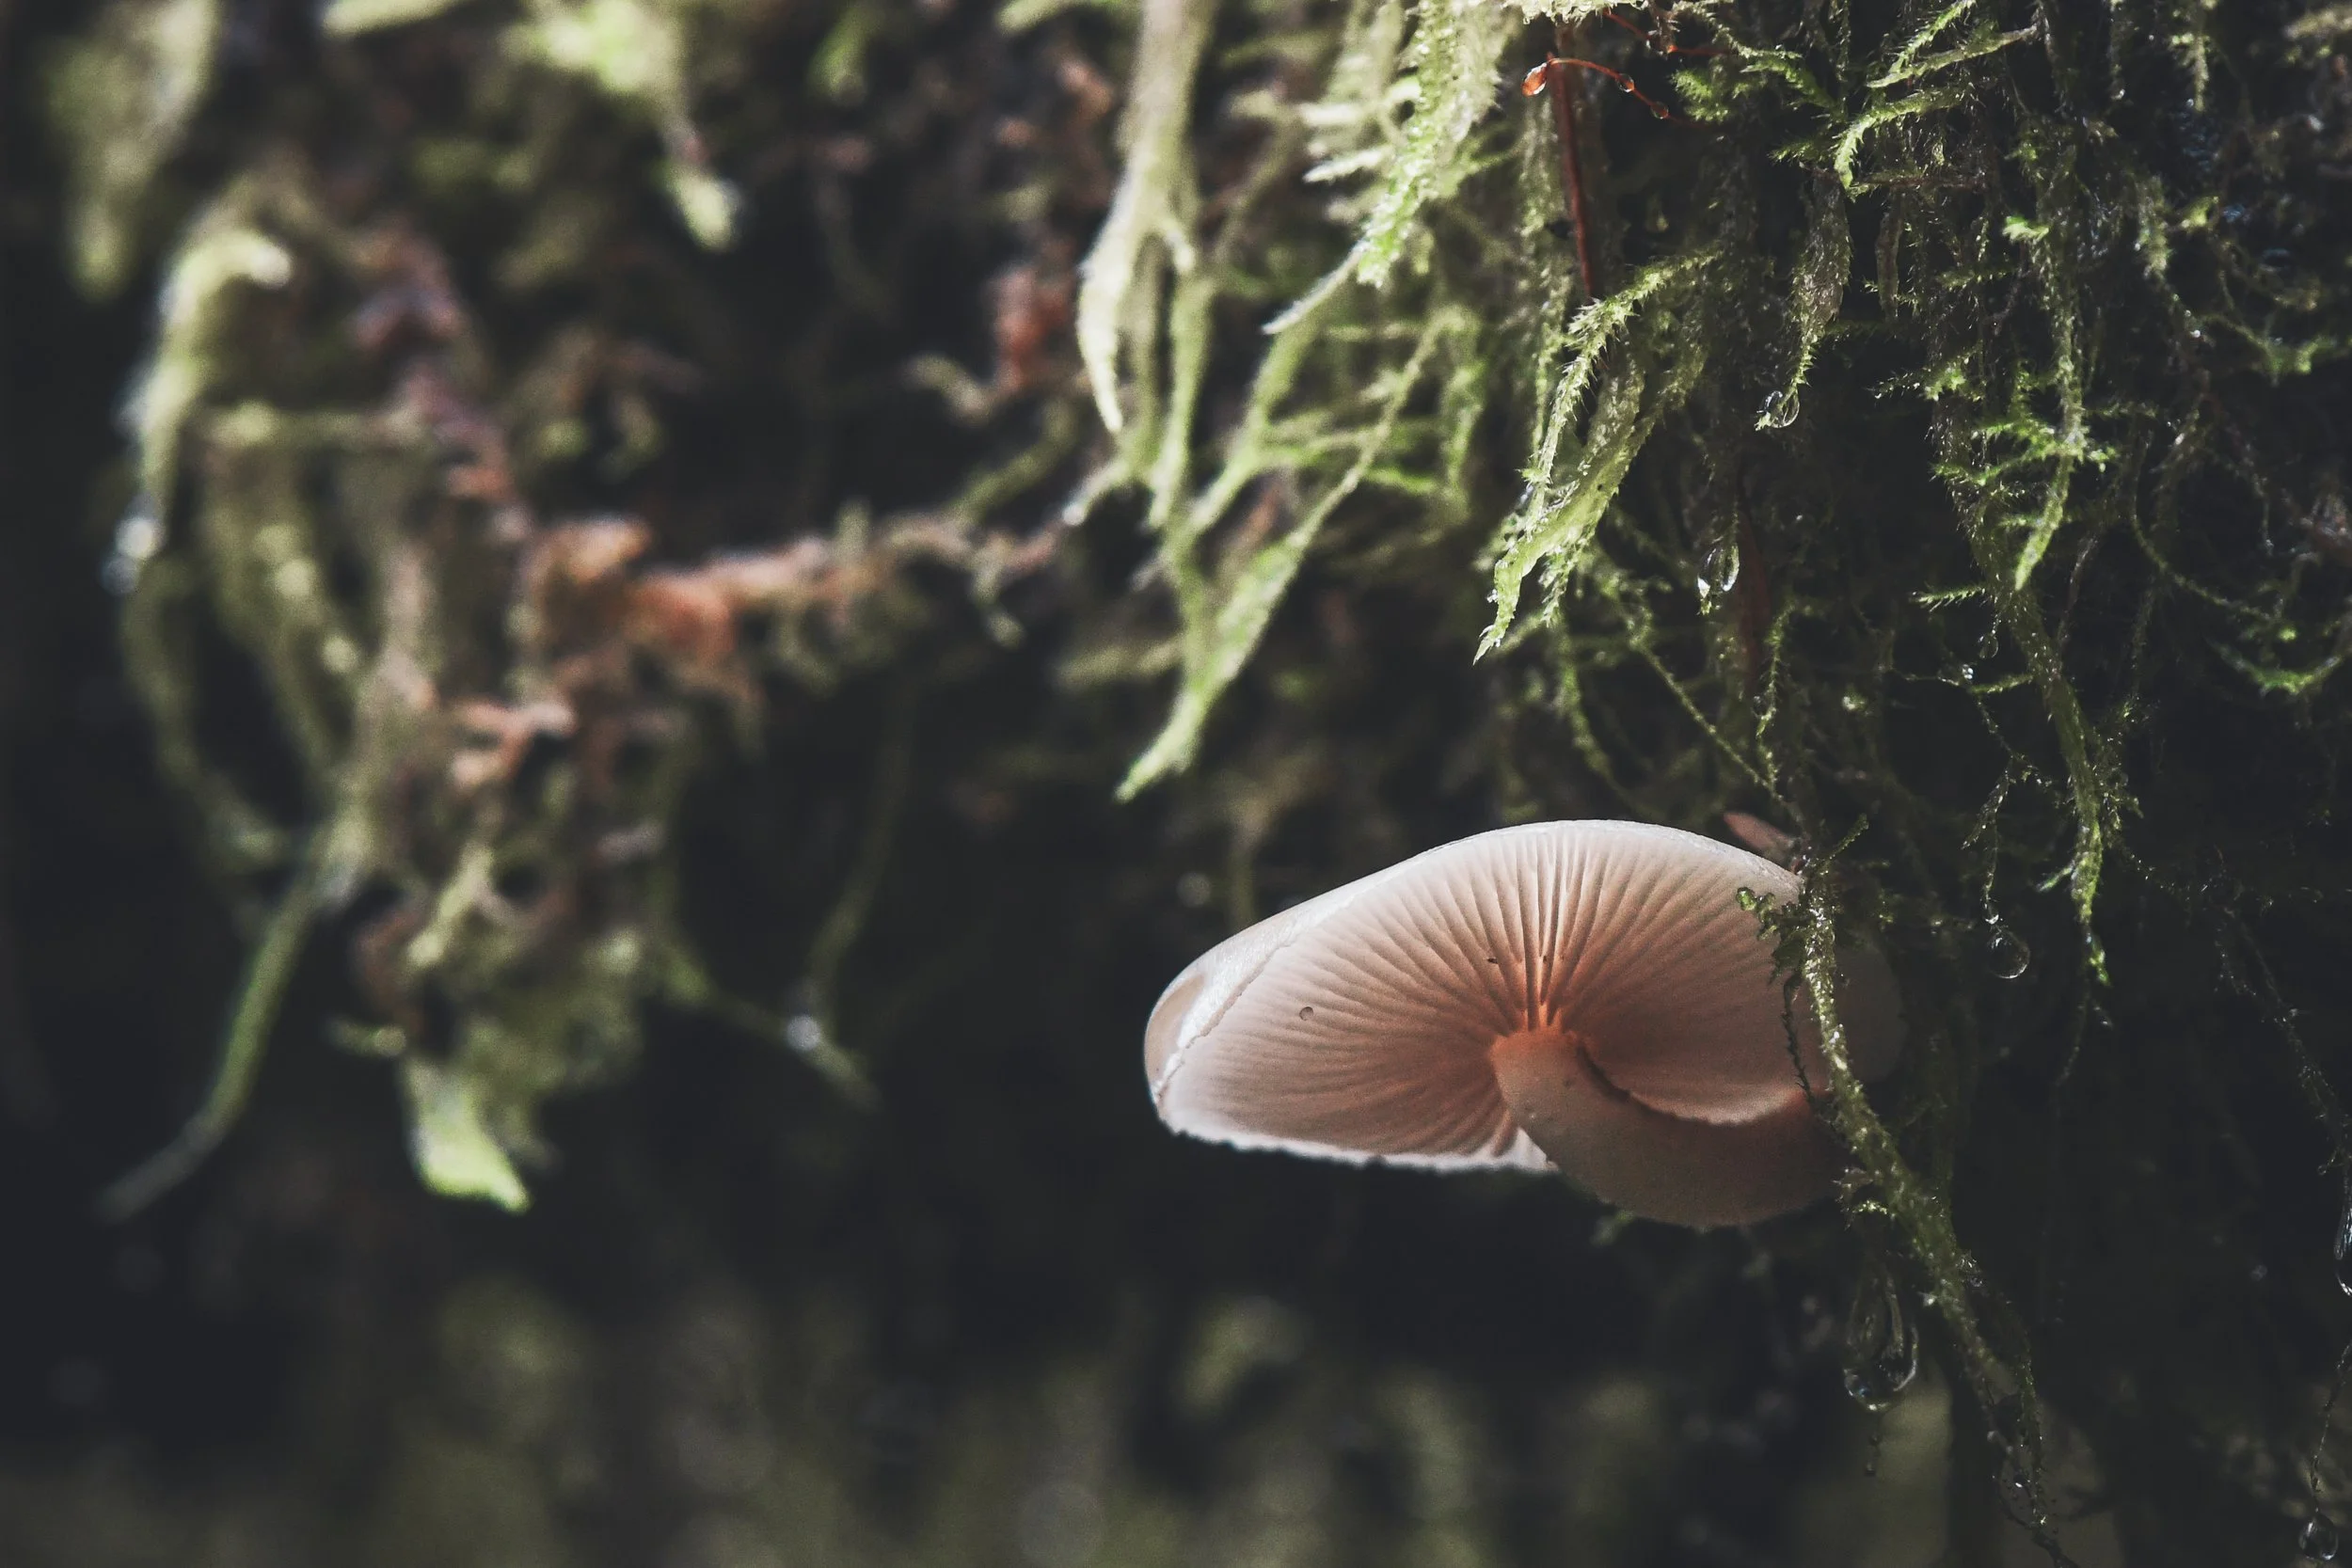
Lighting may not always be as apparent as in a warm, glowing sunset. During overcast, rainy days, it can be challenging to find light to play with. Maybe a couple sun rays will eventually break through the clouds. Maybe the fog in a forest will start to break and the sun will create beautiful beam of light between the trees. Maybe it’s playing with angles so the light can find tiny details.
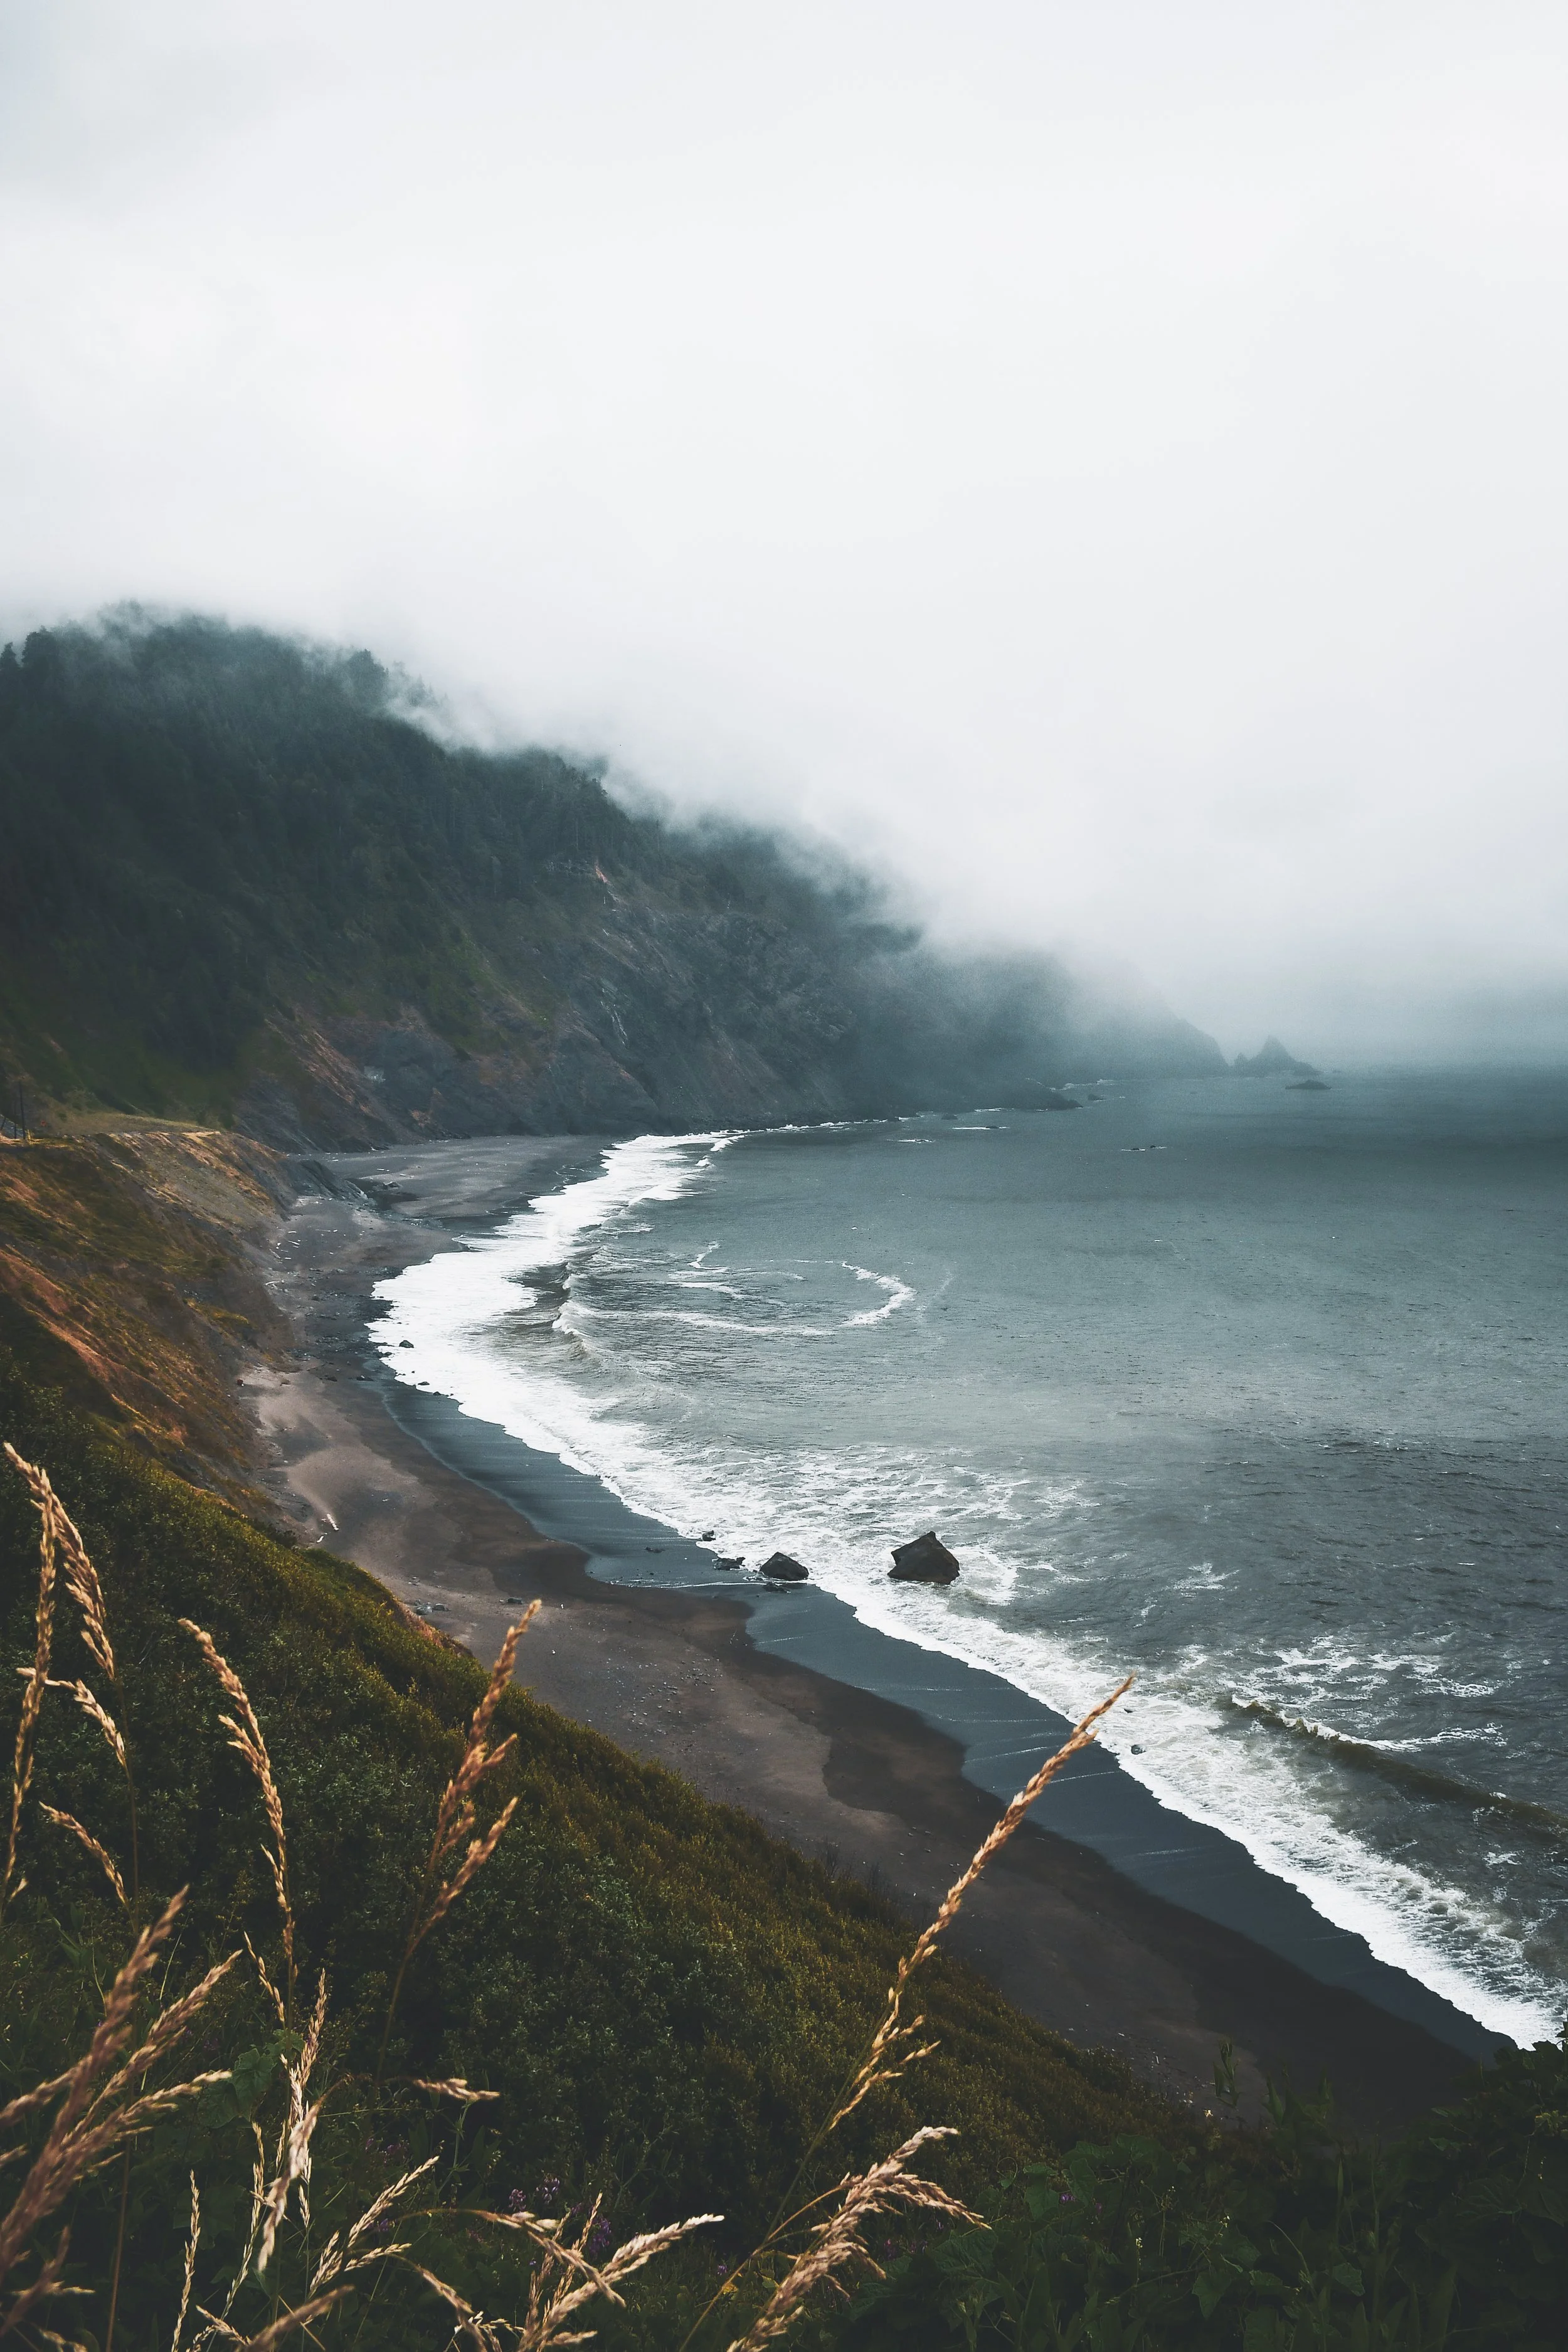
The photos below were taken on a recent trip to the coast. Despite heavy cloud cover, the sunset lit up a small corner of the sky. On a hike in Ecola State Park, I was able to get underneath the mushroom so the light from the overcast sky could illuminate the edge and highlight the ridges underneath. Finding the light is a fun part of outdoor photography and it’s worth being patient for!
Choose Your Camera Settings
After capturing the photo of the bluejay with the goldfish, the fog did lift and I captured this misty, dreamy image near the Paradise visitor’s center. Even with the fog a little higher, there were still implications from the weather I had to take into account to get the right photo. I used a slower shutter speed to soften the mist hanging in the air and allow enough light to get in the shot.
Mt Rainier- Photo Credit to Rachel Irene
Photographing in rain and snow has similar challenges to capturing images in the fog. The precipitation in the air is going to be in your photo as well and it can make your images appear fuzzy or muted. However, your shutter speed can change the way the rain or snow appears. If you look at the left side of the photo below, you’ll see rain drops falling in the fog. Play around with different shutter speeds to get the image right or be patient while the weather shifts.
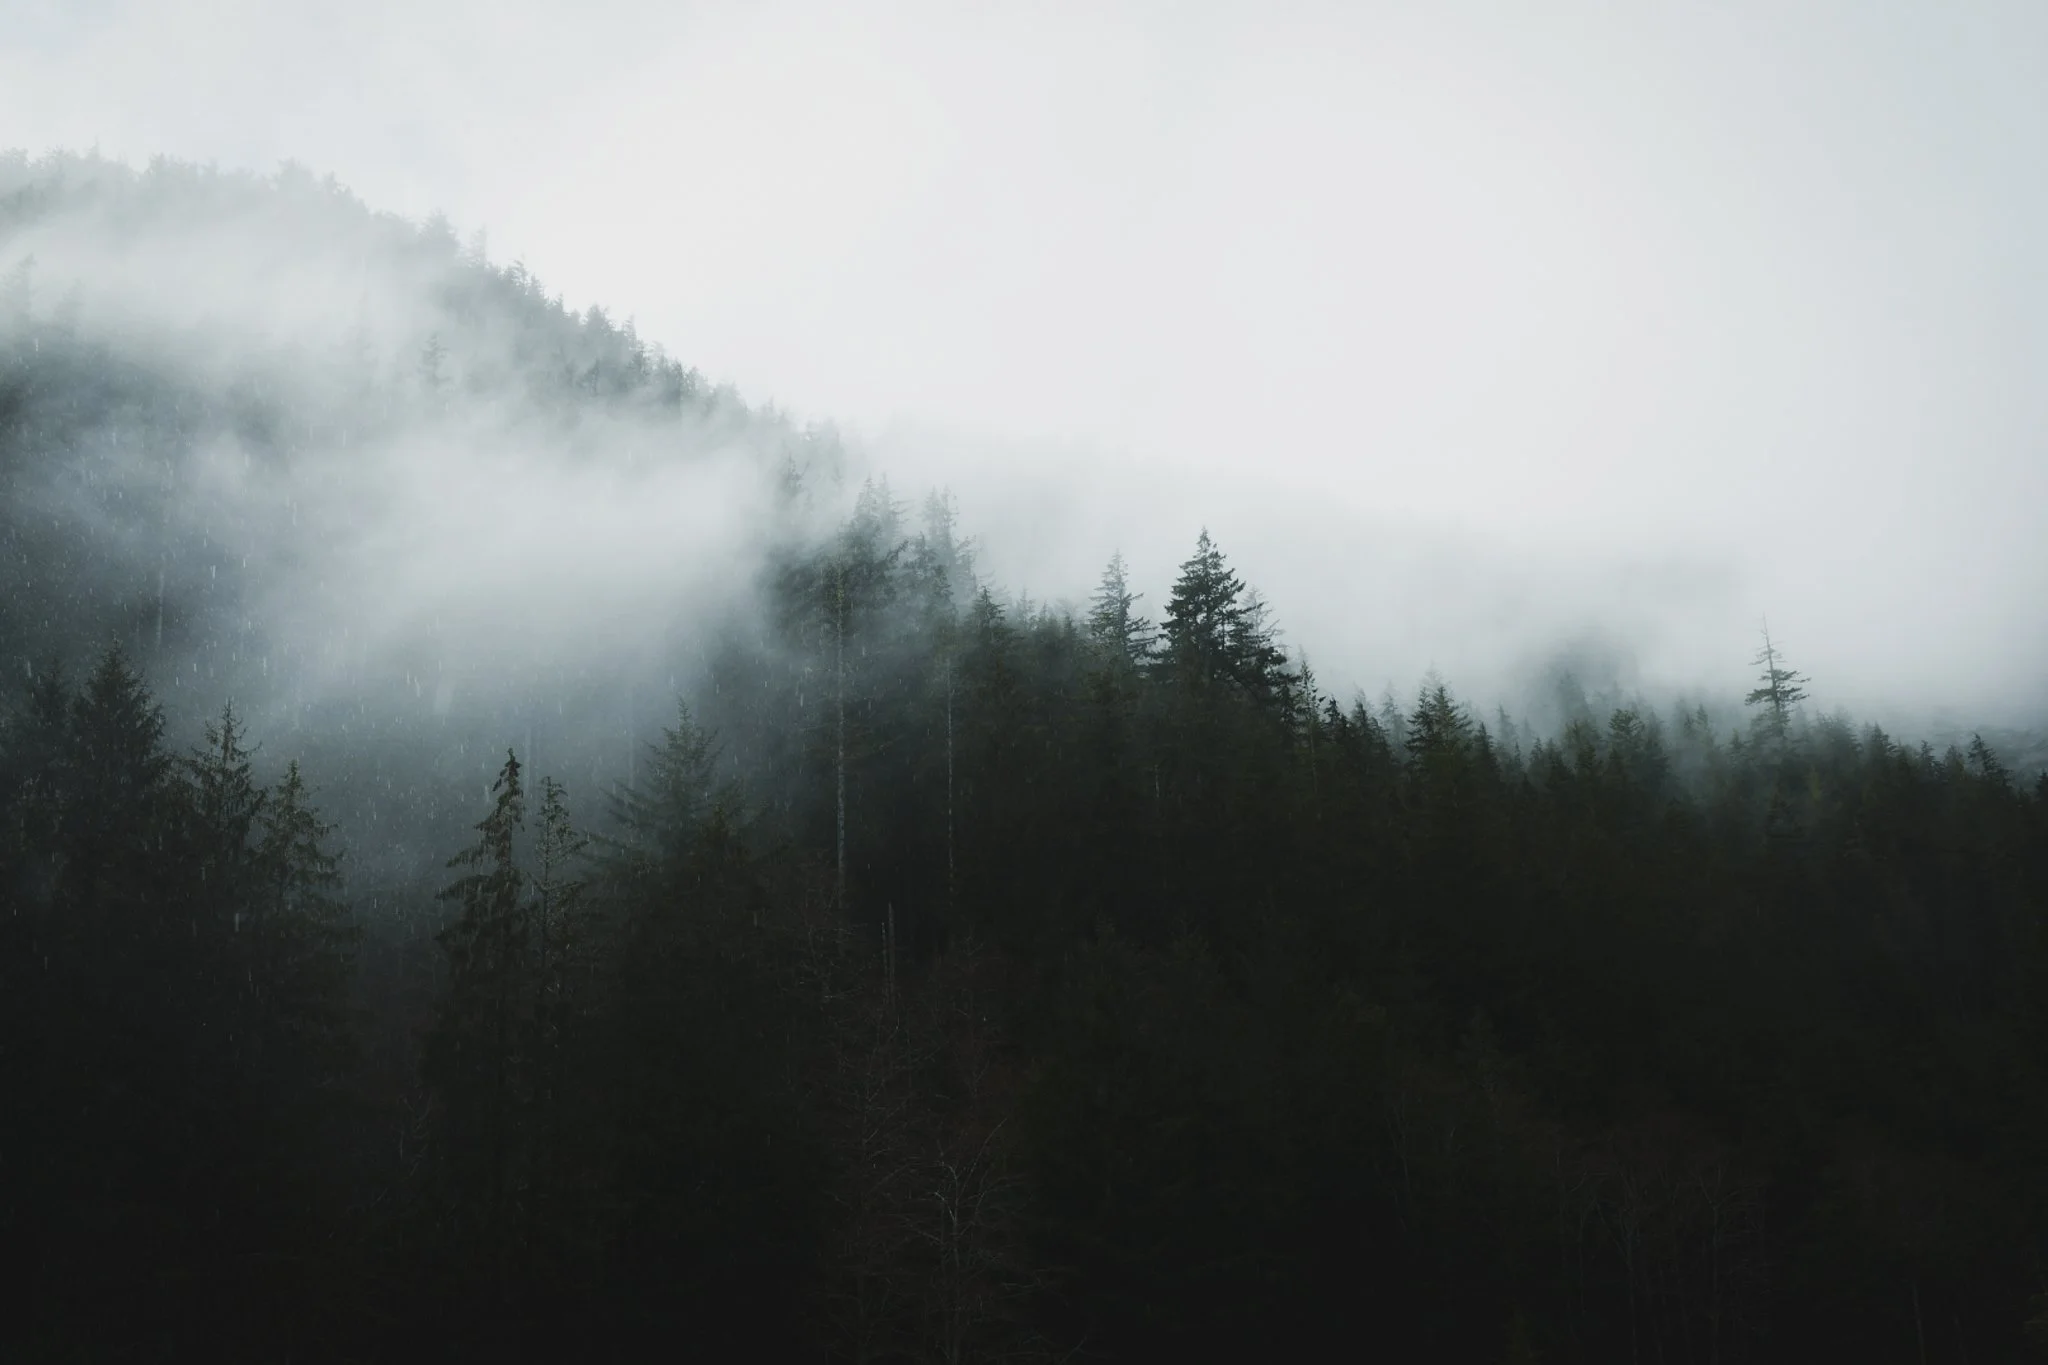
Olympic National Park Forest- Photo Credit to Rachel Irene
Another camera setting that can help up the mood factor is your exposure. I typically slightly underexpose photos and videos so that I can play more with the shadows and contrast when editing. I also find that lowering the exposure can keep overcast, white skies from getting blown out which is important for adjusting them later on. When in doubt, I usually take a few underexposed photos and then another few shots that my camera deems properly exposed. This way, I have multiple shots to choose from when editing.
Editing
I enjoy editing photos, particularly the moody ones because they often illustrate such powerful energy and emotions. I love taking a raw image and editing it to match how the scene or subject felt to me. Every single photographer has their own editing style and I’m always reluctant to share editing advice because I think so much of the process comes down to perspective and personal preference.
For me, I edit in Lightroom (mobile and Lightroom Classic). I usually play with shadows, blacks, and highlights the most. I sometimes cool the tones and reduce saturation if needed. I use masks regularly to adjust the exposure, clarity, and/or highlights on different parts of the photo. Finally, I usually adjust the tone curve slightly.
My best advice for editing moody photos is this: find your style, find the elements of editing that allow you to express yourself artistically, and save those settings as presets so you have them for the future.
A Final Word
I think photographing in the rain, snow, fog, and wind has taught me some important lessons. Things like the importance of flexibility and trusting the process. I have learned to slow down and notice smaller details. Above all else, moody photography has taught me there’s no sense in waiting for perfect conditions. Get out there, now, and find what’s waiting <3
Looking for more photography tips, travel guides, and stories from the road? Consider subscribing to my Substack- Solo on the Scenic Route!
**Affiliate Links- I may earn a small commission from the links above. Thank you!